How to make a photo collage in Photoshop in 9 easy steps
We all pragnemo tell the story behind the help of one photograph. However, in rich ways of well-designed collage, it can be a miraculous way to make the eyes look richer. This method can come in handy for photographs on the go, capture of restlessness, or to create a family photo shoot!
Creating a collage with Photoshop is easy, so let's get it right. Respect that I work with Photoshop CS3.
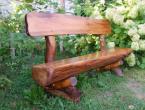
The choice of photographs may be of great importance. You need to choose such a combination of elements in the collage, so that you can imagine the whole podium. This means that you need to take a few great stars to show the whole scene, and a few detailed photographs to show rich textures and special features. Without quiet others, the story will be uneven and it will not be possible to convey quiet emotions, as you can convey.
Krok 1. Open selected photos for collage inphotoshop
View all selected images from Photoshop. It will be necessary to take at least three, but also unique a great number too much. Sound, I will circle my choice of photographs and kіlkіstyu vіsіm. Remember that the more photos you choose, the more details you will look at.
Krok 2. Create a new file
Create a new file (File -> New). Yogo rosemіr is guilty of but a trio more, lower than the one you want to take into account in the result. I always work yoga 20x30″ at 150ppi.

Krok 3. Add photos one by one
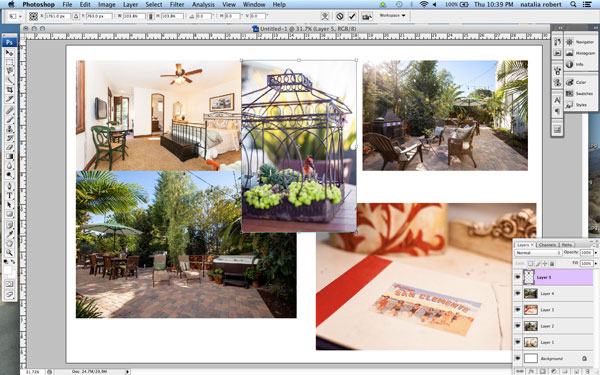
Go to one of the selected photos, select all for the additional viewing tool (or press CTRL+A). Press the CTRL+C key to copy. Go to the new document and press CTRL+V to insert the video. In this manner, you copy the photograph into a new document on the ocremium ball. Fallow in view of the expansion of that diverse building of the image, you may need to trim them. Press CTRL+T to make it work. Vykorivayte kutovy vuzol and pressing the Shift key, set such a size so that the image can be manually moved in a new document.
Note: You will turn the image ball onto a smart object, while maintaining the integrity of the image quality at the hour of changing the world.
Krok 4. Create a collage layout
After that, since you have added all the photographs, for which you want to create a collage, we are here to take care of them! Move the image until quieter, until you see how this rendering best conveys your story. After making a lot of collages, you choose your own style. I see the priority either to create symmetry in the layout, or to make it look like a puzzle. Somehow it seems, for your skin history, use your own.
Croc 5. Give space to images
If the layout is ready and the photographs have been added to the visual space, you can create a thin line between them, to add a little bit of visual space. This crop is not obov'azkovym, and the width of the various smugs can be similar to yours.
Sobbititse, choose the ball of the image, which you want to move, it speeds up with the arrows on the keyboard, to break yoga in different directions. The choice of arrows on the keyboard replaces the bear to help create the same space between photographs.
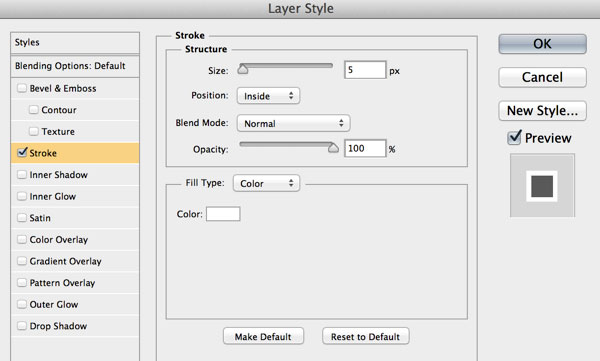
As an alternative, you can add them in and twist the Style to the ball (choose Outline > All in), adding a white or black border to the skin image. See screenshot below.
Croc 6. Unite mustache shari
Once your collage is ready and the photographs are divided the way you want, eat all the balls right away. To do this, press Ctrl+Shift+E.
Krok 7. Prepare the image
After combining all the balls into one, cut the image so that the greater space on the sides of the letters is the same. On my collages, the edging is usually too thin, so I don't bother with faucets.
![]()
Krok 8
Perhaps you will change the size of the finished collage for endorsement in social media. I recommend that you save the style of the original from the JPEG format for the possibility of re-writing it in the future.
Krok 9. Add a watermark, if you wish
If you want to put a watermark on your masterpiece, then it's just the hour. If you do, don't forget to re-combine all the balls and save the file in JPEG format. Now you are ready to show your collage to the world.